Here's the backpack tutorial! Again, the original idea is from Mary Arima at Splitcoast Stampers. She deserves all the credit!! :o) I used the BigZ Scallop Envelope and the Box 3 dies to quickly create my backpack.
You will need 3 diecuts from the Scallop Envelope die. From the Box 3 die, you will need 2 side diecuts and 1 bottom diecut.
Cut off the bottom of the Scallop Envelope die cut, with the scallop flaps folded and adhered towards the inside, adhere the box together.
This is a picture of the flaps adhered inwards.
This is the third diecut from the Scallop Envelope die. Score 1/2" from the scoreline towards the flap. Cut off the two side wings. We will call this the lid.
This is the back of the box we previously made with 2 pieces of the Scallop Envelope die. The lid is adhered on the back of the box.
A picture of the front of the box where I am just adhering the lid.
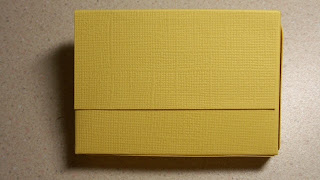
The finished box with lid. I sealed my box lid with velcro.
Now onto the large main portion of the backpack:
Now onto the large main portion of the backpack:
The purple paper is my pattern for the lid.
Get your pattern here. Deselect resizing option!!!
I have attached the box sides together and adhered one side of the bottom of the box. I also adhered the lid to the top. 6 holes were punched to which I will set eyelets: 4 on the lid and 2 at the corners on the bottom back.
Another picture of the backpack adhered before the lid was put on.
The middle of the ribbon (24 inches) sticks out from the two eyelets closest to the scallop part of the lid.
Knots are tied and then both ends go out the bottom eyelets and then back in from the bottom of the backpack where I will tie a knot and cutoff the excess (See picture below)
The box is then glued all together to create the larger part of the back pack.
Now all you have to do is to decorate the bag and place velco dots.
Hope this was informative!! For more detailed information, check out Mary's link above. I didn't deviate too much from her instructions. Of course, you are also free to contact me. If you create one using these instructions, send me a note! I'd love to see your backpack!!
Happy Creating!


1 comment:
Wow! What a super long, but detailed tutorial. Thanks for taking time to create a tutorial for the backpack. I will have to try it out one day soon when I have a spare minute. :)
Post a Comment
Thank you for taking the time to comment! I appreciate YOU!